Showing posts with label pond construction. Show all posts

Thursday, March 24, 2011

Spring Veggies Coming Along Nicely!

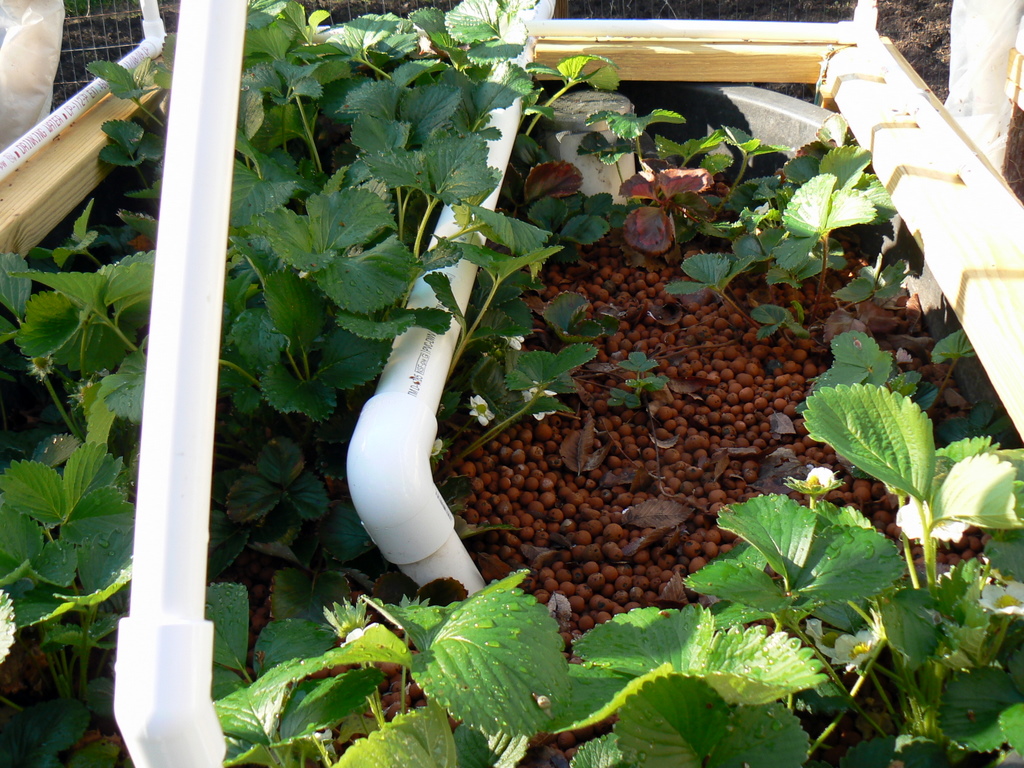
In my established system, things are looking really good. I've already harvested a ton of arugula that we've used in salads and also made a nice pesto out of. There's more arugula on the way, too. Spinach is looking nice and ready for harvest. More salad for me and spinach quesadillas for my son. Some of the cilantro grew up nicely, and that ended up in some of my famous salsa (thank you Giemzales!) The strawberries are looking fantastic, and there are plenty of flowers blooming.

The broccoli seeds have germinated well, as have the broccolini, so things are looking up. With one batch of arugula out of the way, I have some space for tomatoes. I've already purchased 4 seedlings, but the weather's not cooperating. It's been over 80 the past two days, but it's supposed to drop to near 32 tonight and not get above 60 for the next 5 days. So, I'll wait a week to stick them in the grow bed.

Some of the worms that I put in there last year survived the winter. I'm not sure how they managed that, since the grow beds were flooding continuously. Hardy little suckers!

Spinach on the right, broccoli on the left (need to thin it)

Strawberries

Cilantro/broccolini on the left, spinach in the middle, arugula on the right

Pond plants seem to be taking off even earlier this year than normal.

Sunday, July 18, 2010

New Portable System Built!

I've had some serious discussions with a new group called AquaPlanet about going into business together. My role would be a "partner", and I would basically be an aquaponics consultant. Though it's early on in the game, I'm excited about the prospects of doing aquaponics full-time. My role as a partner would be to help teach workshops, consult on new/existing systems, and program and manage the web site, which we are just getting started on.

All that as a background to this new portable system. Since I'll likely be giving workshops, I figured it would be good to have a system that I can bring to show the students. I didn't want to do something small in a fish tank, 'cause I don't think that really captures the magic of aquaponics. Plus, I wanted it to be big enough to be useful to me, since I'd be investing my time and money into building it! So, I thought about what I would need as far as supplies and finally got some time this weekend to put all the pieces together.

First, the materials:

* 110 gallon stock tank from Tractor Supply ($60)
* 630 GPH pump from 5th Season Gardening ($55)
* 3'X3' Botanicare Tray from Sunlight Supply ($100)
* 2 treated 2' X 4' piece of lumber from Lowe's ($8)
* 2 sawhorses (I had some sitting around, but they'll run you about $35 new)
* PVC fittings for the drain from Lowe's ($10)
* 3/4" garden hose from Lowe's ($30)
* shut-off valve for the hose from Lowe's ($2)
* 15 slotted pots from 5th Season Gardening ($15)
* large bag of hydroton from 5th Season Gardening ($35)
* 4' X 8' sheet of polystyrene sheathing from Lowe's ($10)

So, if you stop right there, you have my system, but it's not portable.

The portability comes in by also buying:

* 2 55-gallon (clean, used, with hose faucet at bottom and removable lids) from Baytec Containers ($100)
* 1 FishAlive KA 1100 aerator (not yet purchased, but should be about $65)

Portability is achieved because:

* I'll pump out half the water to each of the 55 gallon drums on my truck.
* I can scoop out the fish with a 5 gallon bucket and put them in one of the drums on the truck
* The aerator can keep them alive for many hours (6+) while driving
* The plants are in pots that I can take out, one by one
* That leaves just the parts to carry, which, when dry, are easy enough to lift


Here are the photos:
 This is the system, all set up and running on my back deck. Having a nice, level spot is key. Grow bed on top with 15 pots filled with hydroton, fish tank under it, regular garden hose delivering water from pump in tank (can't see)

 This is a 6" pot with hydroton. Planting in pots will make it easy to move the plants around and disassemble and reassemble the system in a different location

 This is the bell valve cover, patterned after Affnan's design. I had to modify it slightly, because the Botanicare trays have channels for the water to run through. So, the teeth are different on mine than on his (and he definitely does a nicer job of making his look tidy and professional!)

 If you pull off the bell valve cover, this is the drain. It's a 2" funnel design that goes into a 1" bulkhead fitting (see below). Without the bell valve design, water would flow in and then out this drain, but never go any lower than the top of the drain. With Affnan's siphon, though, almost all the water drains out, even while it is filling!

 This is a look "under the hood". You can see the bell valve in place, the big teeth positioned in the channel while the little ones are on top. The tops of all the teeth are about level. I eye-balled it, so I'm sure it's not perfect.

 This the bottom of the bulkhead fitting and then the drain into the fish tank. I ended up with a double elbow to minimize splashing and find the right balance to get the siphon to work properly.

 I purposely bought a pump that was a bit oversized for my system, knowing that when I'm setting up and taking down my system remotely, it'll be nice to have a little more power, so I don't spend so much time standing around waiting for water to move from point A to point B. So, I needed a little flow control on the inlet to get the siphon to work properly.


 I have to say that the hardest things about this were:

* Getting the siphon to work properly. I tried a lot of different combinations - altering the flow rate, altering the teeth, altering the length of the drain pipe under the grow tray, adding in elbows under the grow tray,  and even trying to use a sponge to slow the inflow water down a bit. I wanted it to work at full throttle, because I figure it's going to be a little challenging to get the throttle exactly where it needs to be when I'm on the road. But, I couldn't get that to work properly, so I had to choke it down a bit. I plan on marking the exact alignment of the plastic throttle (above), so that I have a pretty good idea about where it goes. However, these siphons are finicky little creatures. Too little flow, and the siphon won't cut on. Too much, and it won't cut off. There is a VERY fine line between these, and you have to hit the sweet spot. Once I got everything leveled and had a good feel for what to do, I was able to find the sweet spot pretty easily, though. For more about this siphon, please see Affnan's blog. I highly recommend it. He goes into great detail about how everything works and has nice figures.

* Cutting the styofoam for the pots. It wasn't difficult, but it takes a long time and is messy. I probably should caulk around all the edges to keep little pieces of styrofoam from getting into the system. I ended up having the most success with a little pumpkin carving knife from a Halloween kit!


The above is probably the world's most boring movie, but it shows the siphon from when it starts draining all the way through until the siphon kicks off and the grow bed is almost completely drained. It's takes about 2 minutes for the tray to empty, and it takes about 10 minutes for it to fill to the point of starting the drain cycle. So, that means that every hour, my system will be draining and filling 5 times. By the way, you'll notice a slight drip/leak. That's 'cause I didn't use any caulk around the bulkhead fitting. Since I want it to be portable, I figured it would be best to take the whole drain apart for moving, so that the grow tray is easy to stack without having a drain sticking out of one end. Since it drips into the fish tank, I don't think it's a big deal.

Yesterday, when I was still trying to get the siphon to work properly, the siphon would work correctly for 2 - 3 cycles, and then it would start to auto-siphon. Today, it's gone for about 3 hours or so without a hitch. I'm hoping that means that it's good to go!

So, I'll let this thing spin by itself for a couple of days. I put about 10 gallons of my pond water in it to help kick start the microbes. I plan on putting about 10 goldfish in here of varying sizes. I want to use this system as a hatchery for tilapia, though. It should fit inside next to my south-facing sliding glass door, so I can keep it going through the winter without having to heat the water. I'm really looking forward to having my own stock of tilapia to use in my pond for the summers, since my supplier has yet to FAIL me! 3 summers in a row I've tried to get tilapia in my pond, and it hasn't happened yet...

Well, sorry for the long post, but I hope it was informative.

Tuesday, May 18, 2010

Problem Solved!

I went with the cheap and easy option - elbows! Found a neat little piece of conduit in the electrical department for the overflow ($3). Kinda looks like this:

          ------(
)-----/

Happened to have some 2" pipe and a 2" elbow, and had some leftover aquarium caulk.

So, I put in the piece I bought (middle), put in the 2" elbow (and a lot of caulk), had to move the pump outlet over a little (the pipe on the right was longer, so that the pump was centered in the skimmer) to make room for the previous two items (and added a lot of caulk), and voila!

Did all of this just in time for the 2.5" of rain we got yesterday. Now the pond is at an all-time high level, with probably an extra 300+ gallons in it from before.

Took the opportunity to update the veggie photos.
Broccoli looking really good. I cut a bunch of it already, fearing that I would somehow let it sit too long again and have it flower.

Tomatoes, broccoli, strawberries, squash, etc.
Basil, tomatoes, strawberries, peppers, etc.

Wednesday, September 10, 2008

End of Summer Update

Well, I've shut down my two garden buckets for the winter. It was winding down anyway, and then we had a ton of rain from a TS that exacerbated my one tilted bucket. So, it made sense to shut down and prepare for a re-tooling for next Spring. This winter, I'll be building a level platform for three buckets to sit upon. And I think I'm going to try to run PVC pipe across the top of each bucket in a grid pattern to drip water down, rather than dumping all the water into one end of the bucket. This new approach will allow me to drain from the bottom, rather than the top, which should completely avoid any of my over-spilling issues that I had this year. More pipe = more costs, yes, but I think the effort will be worth it. I also plan to design in such a way as to be able to easily add more bucket capacity, should I want to or need to. Here are some more flowery shots from the pond area.
Great blue lobellia

Swamp sunflower

Tall tickseed

Bullfrog (thanks web4deb)

Saturday, July 19, 2008

3 Important Lessons Learned & Documenting a Mid-Season Major Fix

Now that summer is in full swing, I have a pond full of fish (if only they were tilapia...), and the pond has had a few months to carve out its own little environmental niche in my backyard, I can share 3 important lessons that I've learned.

Lesson 1: Don't buy a pump with "pre-filters" or a "clean-water" pump. Buy a pump that can handle solids.

So, I started off with the Dynatec 1350 Pond Pump, because I wasn't really sure how many gallons my pond had, and I didn't want to get too much pump. After about a month, it became clear that I needed a stronger pump, so I got the Dynatec 1500 Pond Pump. It was the same size, which made swapping out the old for the new very easy, but had a little more power. Though I was impressed at first, I started having the problems with flow, and it turned out that the little sponge "pre-filter" was getting covered in algae and basically choking the pump. I could fix it easily by putting on a clean filter or cleaning the filter that was on there, but it started to become a hassle. I also noticed that if I just tried to clean the filter, sometimes I'd only get a day or two before it got clogged again.

So, I decided to upgrade the pump, and I went with a Little Giant K-3000 pump. It's bigger and a lot more powerful, but the nice thing is that it can handle solids up to 3/4" or so. Plus, the water in the pond is moving like crazy now, and I think that it finally might actually be turning the water over 1-2 times per hour like it's supposed to.
Here is the Little Giant. It was bigger, and ended up taking up a bunch more space. I took out the big green filter that comes with the skimmer and just put the leaf netting right in front of the pump. It's basically the first thing that anything coming into the skimmer sees. One benefit I've noticed with the increased flow is that the algae is getting sucked into the skimmer and is collecting on the leaf netting. Simple - pull the netting out, shake it a bit, and algae is gone!

That brings me to ...

Lesson 2: Gravel slows the water down a lot, so you need more outflow capacity than inflow capacity, because the water will be moving slower going out than it is going in.

Sure, this is something that makes sense and that I thought about before I put the system together, but I definitely underestimated how it all would work. The upshot is that when I attached the new, more powerful pump, all of my buckets were overflowing! I tried for a while to find the right setting for the ball valves, but I just couldn't find the sweet spot. In the end, I settled on extra drainage from one of the buckets using garden hose siphons. This brings me to...

Lesson 3: Make sure your buckets are level! And even if they start off level, they may settle. They may settle a lot!

Sometimes in the morning, I'd go out and check on things, and I'd notice that the water level was way down in the pond. Sure enough, I'd see some water trickling over one side of a bucket. Since those things weigh around a ton with gravel and water, there's no way of jacking it up to fix that, so the only thing you can do is turn down the in-flow to lower the water level. This only works so long until you don't have enough flow to keep the plants happy.

This happened to one of my garden buckets, but it also happened to the wetland plant bucket quite frequently. There was nothing else for me to do but redo the wetland bucket, and that's what I worked on this weekend.
Here you can see all the hose siphons coming in. Due to the settling of the wetland bucket (just out of the picture at the top and the settling of one of the garden buckets (off to the left but not in the picture), siphons were the only way to keep the water from flowing over the sides of the buckets.

And now on to the weekend's project - empty the wetland bucket (while trying to ensure the survival of all the plants in it), add in extra drainage, level it, reposition, add back all the gravel, rebuild the waterfall to accommodate the extra drainage, and then enjoy!

First, I removed all the plants and put them in this big cooler. I put some gravel in the bottom and filled it with water, just like how it was in the bucket. Only difference is that the water wasn't moving. I put the cooler under a tree so that it would have good shade during the heat of the day.

Then, I removed all the gravel from the bucket. If you've ever wondered how much gravel a 110 gallon plastic tub from Tractor Supply holds, well, there it is! If I remember correctly, it's about 8-9 wheelbarrow loads.

After taking apart the waterfall and a good bit of the rock wall surrounding the bucket (needed to do that to get the bucket out), I added sand and gravel to the bit of ground that the bucket sits on to help get it level. I also had to redo the waterfall to accommodate a new, low drain pipe. Pictured below are all three drain pipes (looking down). The top one is not necessary, but that was where the old drainage was, and I already had a hole, so I figured it wouldn't hurt to put an emergency drainage pipe there just to plug the hole. Also, all of my pipe is 1.5" pipe, but I added in a 2" pipe (PVC white in the photo) to ensure that the darn bucket wouldn't overflow ever again, even if it went off-kilter.
So, after the fish-safe, aquarium epoxy set for 24 hours, I filled up the bucket to test for leaks and see how things looked. Everything seemed to be working well, so I added the gravel back. After the gravel went back in, the water level wouldn't get any higher than the top of the bottom drain pipe! WHAT?! Before, it was overflowing - that was the whole point of this exercise - if I add in more drainage, then it won't overflow. But now, all of a sudden, it didn't need it! Frustrating. The waterfall is supposed to have water flowing down it!
So, after much pondering, I took a hose clamp and tightened it down on the end of the outflow pictured above. It got pretty tight, but it definitely worked, and the water level came up high enough to start to flow out the PVC tube and then down the waterfall! Sure, most of the flow comes out of the bottom pipe, but there's good water coming down from above, and it all blends in nicely. The sound is stronger than ever, and the fish really seem to like it.
With the water flowing well, I added the wetland plants back in, and the project was finished!

Sunday, June 15, 2008

No tilapia this year

Well, I've given up on the tilapia. No word from Foster Pond and Lake, and another blogger sent me an email advising me that I'd never be able to find large tilapia this late that people would be willing to part with. So, we went to Petsmart and bought 30 goldfish. At $0.28/fish, the price was right! Obviously, we don't plan on eating them, so unfortunately, our system will not be a fully functional aquaponics system - more like a water garden/hydroponic veggie garden. Oh well, maybe next year...

Here are some photos. One thing that seems certain - yellow squash seem to like the set up, and so do tomatoes.
The residents - one koi, one comet, and 30 goldfish

Yellow squash raging

Tomatoes doing well

Flowers from a water plaintain, planted in the pond gravel

Monday, June 9, 2008

Still no tilapia!!!

Well, it's been at least a month now since I expected to have tilapia in the pond, and we still don't have any. At least now I know why. The nice folks at Foster Lake and Pond Management get their tilapia from a supplier in southern NC. That guy had an equipment failure this spring and moved his tilapia from the nice, protected shelter of his indoor operation into an outdoor pond on his property. That was great until a hungry otter came in and ate ALL of the fish! Of course, the farmer didn't tell Foster Lake and Pond, but tried to find an alternate supply to meet his delivery. He could not, and that screwed FLP, which, in turn, screws us. FLP was trying to find an alternate supplier late last week, but they haven't called, and I'm beginning to wonder if it is even worth it at this point. We're seriously considering just getting some cheap fish - the cheapest we can find - to stock the pond with for the veggies, so at least we'll know how the veggie part of the aquaponics system works. I must say, though, that the veggies seem to be doing OK despite only two fish. Photo of the main bucket is from June 1. We harvested a yellow squash yesterday.

Tuesday, May 20, 2008

Mid-May Update


I thought I should update how things are going, since it's been about a month. First, we still don't have any tilapia. The word from Foster Lake and Pond Management is that they don't have their tilapia in yet, 'cause of the colder weather this spring. They were confident that they would be in soon, and they'll be larger than usual, so there should still be enough time to grow them out to plate size before it gets too cold this spring.

Sometime soon after my April post, we had a torrential rain that eroded out the mound that the upper bog was sitting on, 'causing it to slant. It was not level enough to use, so I had to empty out all the gravel and re-level. I decided at that point to just run the outflow directly into the pipe that spills back into the pond instead of filtering it through the second bog. Everything's working great now, but I lost all my plants in the upper bog.

As you can see from the photos below, though, we bought some tomato, pepper, and squash seedlings, and they seem to be doing OK. Note also that the lower bog lettuce is coming in, and some tomatoes from seed are also coming in. I think that they aren't getting quite enough nutrients from the two fish that are living in the pond (oh yeah, one of the koi died mysteriously. he was always a little sickly from day 1).

soybeans, lettuce, small tomatoes are original. squash, large tomatoes from seedling


what you don't see clearly here in the upper bog are the little cucumber seedlings coming up from an extra packet of cucumber seeds we had in the house. there are some little pepper seedlings hanging on, as well.


trying their hardest to poop enough for all the plants!


The plants in the pond are doing amazingly well. Considering that they were dormant and kind of runty looking, they have truly gone through a miraculous transformation. Below, you can see what one month meant to a bog arum. And, we were fortunate enough to get one of our iris versicolor's to bloom. For a larger version of that photo, click here.


Next update after the tilapia go in. It will be interesting to see what happens, as the pond system is in a nice equilibrium right now. The water is crystal clear. Many of the plants are yellowing, so I believe they need more nutrients (and soon!), but for now, everything appears to be surviving. I anticipate that once the fish are in, the yellowing will stop and the growing will increase. Stay tuned!

Monday, May 5, 2008

Pond costs

I thought I would share just how much this pond cost, not including time and labor or electricity for running the pond pump (~100 watts/24 hours a day), just so you can get an idea of the amount of effort and money required for set up. I'll also estimate yearly operating costs.

- Landscaping (plants, dirt, etc.): $1756 (48% of the cost)
*$1366 of that was for rocks/gravel - all delivered
- Pond/bog construction (liner, skimmer, plumbing, electrical, bog tubs, caulk, etc.): $1353 (37% of the cost)
- Pumps/filters: $276 (7% of the cost)
*I bought a backup pump and replacement filters, in addition to current one)
- Fish, fish food, meters, nutrient additives: $307 (8% of the cost)

Grand total: $3692

Annually, you'll need to buy new fish, fish food, nutrients, some plumbing/caulk for leak fixes, filters. I imagine that will be no more than $500, but I'll keep track and document after one year has passed.

Saturday, April 12, 2008

Aquaponics Happening!

Well, everything is finally done! The only thing that remains is to pick up my tilapia the first week of May. The pond is running, the bogs are running, the native plant section is planted and mulched, and the plants in the pond seem to be getting used to their new home. The two garden bogs are already showing signs of seedlings, less than one week after putting the seeds in! The native plant bog is looking great, and one of the dwarf crested irises is blooming! The only species that I'd like to add are some pitcher plants, but the only ones that I can find so far (Lowe's) aren't the native varieties found in NC.

Species List:
In the pond:
- iris versicolor (blue water iris)
- pellandra virginica (bog arum)
- lubellia syphilitica (great blue lobellia)
- sauronus sp. (lizard's tail)
- pontederia cordata (pickerel rush)
- acorus calamus (sweet flag)
- alisma subcordata (water plantain)

In the pond bog:
- chamaelirium luterm (fairywand)
- lobellia cardinalis (cardinal flower)
- hydrophyllum virginiaum (eastern waterleaf)
- iris cristata (dwarf crested iris)
- iris bericaulis (zigzag iris)

In the native perennial garden surrounding the pond:
- oenothera fruticosa (southern sundrops)
- callicarpa americana (american beauty berry)
- peristemon smalli (small's beardstongue)
- symphotichum oblongifolium (eastern aromatic aster)
- muhlenbergia capillaris (hairgrass)
- coreopsis triptens (tall tickseed)
- silene virginica (fire-pink)
- helianthus augustifolius (swamp sunflower)
- rudbeckia fulgida (orange coneflower)
- stokesia laevis (stokes'-aster)
- heuchera americana (american alumroot)


Monday, January 28, 2008

Waterfall and First Bog Rough Draft


So, as you can see, it's starting to take shape! We had some nice slabs of slate lying around the yard, so I gathered up what wasn't being used, and am now using it for the waterfall. It makes a nice path for the water, since it's so smooth and natural looking. After I finish up this web design gig that I'm doing, I'll have enough money to get another load of rocks to finish up the landscaping and pretty it up. Note that the pond is only about half full at this point. Still need a couple of big rain events to finish it up. I've attached the garden hose to my rain barrel on the porch, so I'm using the water from my roof to fill the pond.

Here's a side profile of the design. You can see the 110-gallon bucket "bog" on the right. There's a PVC inlet on the right. This is where the pond water will come in. The PVC pipe has a bunch of holes drilled in it starting about half way down. The theory is that the water will fill in the PVC pipe (which keeps out the gravel), then pour out through the holes to fill up the rest of the bog. The outlet for the bog is contained in the PVC pipe on the left, which also has holes drilled in the bottom half. The water rises up to a point just below the surface, where it exits via another pipe, that is drilled through the bog wall.

If you look carefully, you can see the mistake hole on the right side of the PVC. My first try, the pipe was tilted up so that it almost came to the top of the PVC. This turned out to be too high to drain the water out before the water reached the surface of the bog and spilled over the side. No harm done - redrill - and recaulk (using aquarium-safe silicone).

Next step will be to install a two-way switch (ball valves and a T), so that I can direct the water flow through the supplemental 2 grow beds during the summer when there are more fish in the pond. Then, I'll probably try and set up the other two grow beds, fill in with gravel, and connect to the bog pictured above. Then, I'll need a little dirt to fill around the bog above. The plan is to put dirt all the way around, then carve in some steps for some above-ground planters. Then, when the rocks are in, rock all around and tidy up.

Sunday, January 20, 2008

Pond Installed!!

Well, the pond itself is installed! A lot of things came together last weekend (1/11-1/13): the underlay/liner was delivered, rocks were delivered the previous Wednesday, and I found a guy who could get me a load of gravel to suit that day. So, Friday, after everything arrived, I figured I had all the ingredients, so I might as well cook!
Rocks (rounded river, large flat) and gravel for pond

After putting in the underlay, Liz helped me stretch out the liner and stuff it into all the cracks. I think we probably could have done a better job of smoothing out all the wrinkles, but given that this was our first real attempt at this, I think we did OK. Also complicating the installation was the fact that the water table was up above the bottom of the pond, so the pond bottom at its deepest part was actually more like quicksand. Once rocks were put in, the bottom sort of bulged out, but I figure it won't make too much of a difference once the water is in and pushing down on everything.
Liner in place (EPDM, Firestone Pond Guard, fish safe)


Rounded river rocks in place to hold in/hide liner


After some work getting everything into the skimmer and running the plug through some makeshift conduit to the outlet, I covered everything up and put out the big flat rock on the top level of the pond. It was at this point that I realized that we vastly UNDER estimated our need for rock. We ended up using 2 tons of rocks just for inside the pond and the pond lip. We easily need another ton around the top outside, and then at least a ton for the water. It's a bummer, as we'll have to pay for shipping twice. The lesson here is BUY MORE ROCK THAN YOU THINK YOU COULD CONCEIVABLY USE!! We actually did that, but since we had nothing to compare it to, we did a poor job of estimating.

After the rocks were up, I cut away the excess liner. By the way, it looks like we ordered way too big of a liner, but as it turns out, you can only order it in multiples of 5. We ordered 25' X 25'. But after cutting around the pond, there were many sections that we less than 5' wide, so we did not over order. It's definitely better to over order than to not have enough to go all the way up.

After some rain and snow this weekend, the pond is filling up nicely! I resolved to not use any groundwater to fill it, given North Carolina's drought situation, so I hooked up one end of a hose to our overflow for our rain barrel, so the pond gets filled with rainwater/melt-water from half the roof of our house.

Unfortunately, I must have put a little too much on my back, and it gave out unexpectedly last week without notice. As soon as it gets better, I have to set up the grow bed/bog and waterfall, as the pond will soon be full enough to begin running the pump.